

How to Bridge Assets to Celo: A Comprehensive Guide to Cross-Chain Transactions
Decentralized applications (dApps) have revolutionized how we interact with blockchain ecosystems.
With the rise of multi-chain environments, bridging assets across different networks has become crucial.
This comprehensive guide will explore how to bridge assets to Celo, a fast-growing blockchain platform, using the Optics Bridge GUI.
Whether you want to bridge fungible tokens or other assets, this step-by-step tutorial will provide you with all the information you need to carry out cross-chain transactions successfully.
Also read: How to Bridge to Ripple?

Getting Started
To bridge assets to Celo, you must follow a few preliminary steps.
Install Metamask
The first step is to install Metamask, a popular cryptocurrency wallet and browser extension. You can download Metamask from metamask.io.
Once installed, create a new wallet or import an existing one.
Ensure Sufficient ETH Balance
Before proceeding with bridging assets, ensure that you have a sufficient balance of ETH in your Ethereum account.
You’ll need this to handle transaction fees and smooth the transfer process.
Bridging ETH from Ethereum to Celo
Once you have Metamask installed and a sufficient ETH balance, you can bridge assets from Ethereum to Celo.
Connect Metamask to Ethereum Mainnet
Open the Optics Bridge app in your browser by visiting optics.app.
Connect your Metamask wallet to the Ethereum Mainnet network.
Select “ETH on Ethereum” as the Source Asset
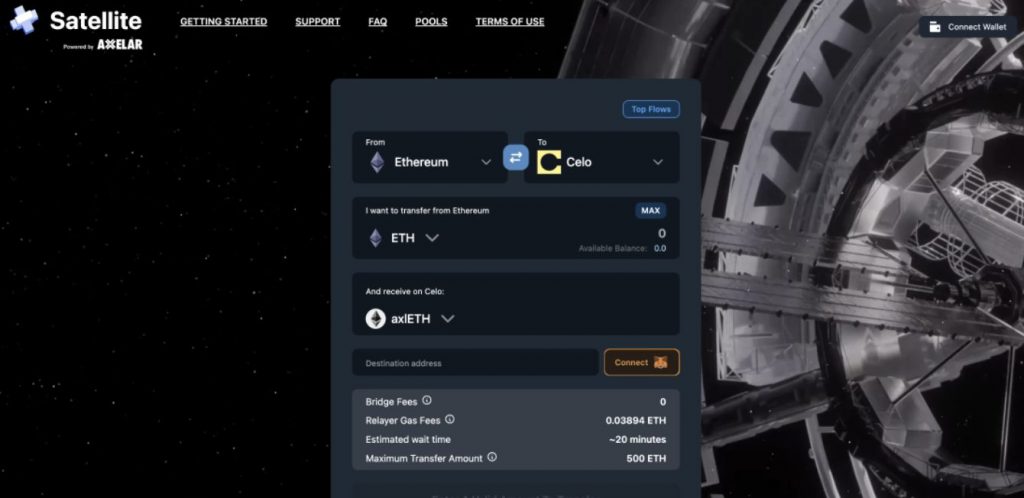
In the top From section of the Optics Bridge GUI, select “ETH on Ethereum” as the source asset. This indicates that you want to send the ETH asset that is currently on the Ethereum network.
Enter the Amount and Destination Details
Enter the amount of ETH you wish to bridge and specify the destination chain as Celo. Provide the destination address where you want the bridged assets to be sent. The sending address will be filled in by default.
Confirm the Transaction
Click the “Bridge” button to initiate the transaction. A Metamask pop-up will appear, asking for confirmation. Review the transaction details and click “Confirm” to proceed.
Track the Transaction in the Optics Bridge GUI
After your transaction confirms, the Optics Bridge GUI will direct you to the Transaction History tab.
So, here, you can track the progress of your bridging transaction.

To check the transfer status, hover over the “Status” of the transaction.
Verify the Transaction’s Success
Once you approve the transaction, the transaction details might take a while to show in the transaction history.
If you don’t see your transaction details immediately, don’t worry.
Furthermore, to ensure the success of your transaction, you can check a block explorer of the source network, such as Etherscan, to verify that your transaction to the bridge was successful.
Once the bridging process is complete, your ETH will show up at the specified destination address on the Celo network.
Bridging WETH from Celo to Ethereum
If you want to bridge WETH from Celo to Ethereum, follow these steps:
Connect Metamask to the Celo Network
Open the Optics Bridge app in your browser and connect your Metamask wallet to the Celo network.
Select “WETH on Celo” as the Source Asset
Choose “WETH on Celo” as the source asset in the Optics Bridge GUI.
So, this indicates that you want to send the WETH asset that is currently on the Celo network.
Enter the Amount and Destination Details
Enter the amount of WETH you wish to bridge and specify the destination chain as Ethereum. Provide the destination address where you want the WETH to be sent.
Additionally, the sending address will be automatically filled in.
Approve the Optics Bridge to Send WETH
Click the “Bridge” button to initiate the transaction. Metamask will prompt you to approve the Optics Bridge to send WETH on your behalf.
Confirm the WETH Transfer
After approving the Optics Bridge, Metamask will prompt you to confirm the WETH transfer to the bridge. Review the transaction details and click “Confirm” to proceed.
Track the Transaction in the Optics Bridge GUI
Similar to the previous bridging process, you can track the progress of your transaction in the Transaction History tab of the Optics Bridge GUI. Hover over the “Status” of the transaction to view its current status.
Bridging Assets from Celo to Polygon

The Optics Bridge GUI also bridges assets from Celo to Polygon. Follow these steps to carry out the bridging process:
Add Celo and Polygon Networks to Metamask
Before bridging assets, ensure you have added the Celo and Polygon networks to your Metamask wallet. This will allow you to connect to these networks within the Optics Bridge app.
Ensure Sufficient Celo Assets
Make sure you have enough Celo assets in your Celo account to cover the bridging transaction and any associated fees.
Enter the Amount and Destination Details
In the Optics Bridge GUI, connect your Metamask wallet and select the Celo network.
Additionally, enter the amount of Celo assets you wish to bridge and specify the destination chain as Polygon.
Also, provide the destination address where the assets are sent. The sending address will be automatically filled in.
Allow the Bridge Application to Send CELO
Click the “Bridge” button to initiate the transaction. The Optics Bridge GUI will request permission to send CELO on your behalf. Approve the request to proceed.
Confirm the CELO Transfer
Confirm the transaction by following the prompts in Metamask. Review the transaction details and click “Confirm” to proceed with the CELO transfer to the Optics bridge.
Track the Transaction in the Optics Bridge GUI
As with previous bridging processes, you can track your transaction’s status in the Transaction History tab of the Optics Bridge GUI.
Additionally, hover over the “Status” of the transaction to view its progress.
Also read: How to Bridge to Mantle?
Conclusion: How to Bridge to Celo
In conclusion, Bridging assets to Celo using the Optics Bridge GUI is a seamless process that allows you to transfer assets between different blockchain networks.
Whether you’re bridging ETH from Ethereum to Celo or WETH from Celo to Ethereum, the step-by-step instructions provided in this guide will ensure a smooth and secure transaction.
The Optics Bridge GUI also enables you to bridge assets from Celo to Polygon, expanding the possibilities for cross-chain transactions.
By following these instructions and leveraging the power of decentralized applications, you can unlock the full potential of blockchain ecosystems and participate in the exciting world of multi-chain connectivity.


